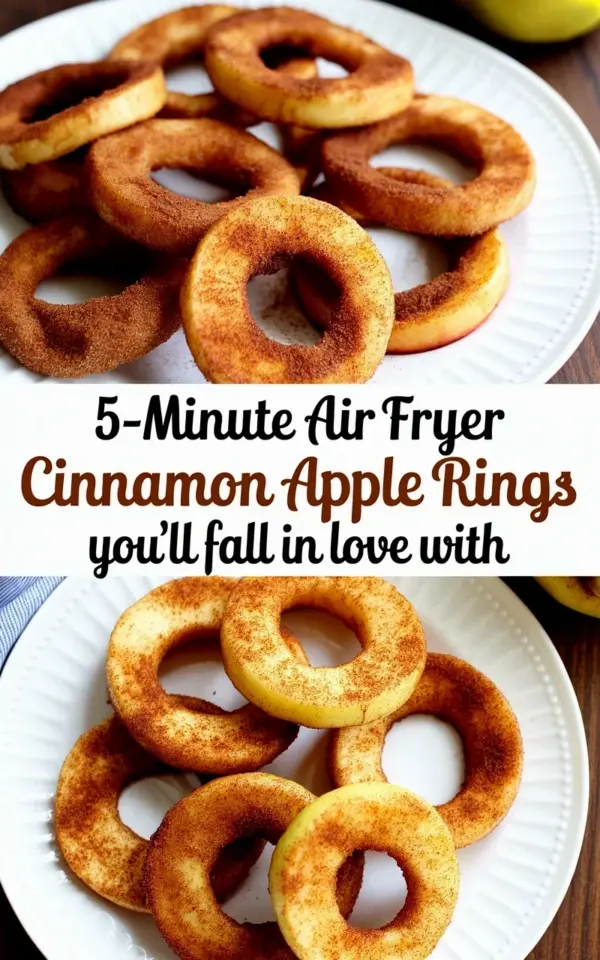
Golden brown rings stacked on a white plate, each one carrying that deep caramelized color you see in the photo. You can almost hear the crunch from here. These cinnamon apple rings have a way of making the whole kitchen smell like a fall festival, but getting them to that perfect crispy state takes a little know-how. Honestly, the first time I made these, I ended up with a soggy mess that tasted more like steamed apples than the caramelized treat I envisioned. The recipe itself is simple, but the technique has a few sneaky pitfalls.
This guide covers the common mistakes that ruin cinnamon apple rings and how to avoid every single one of them. We are talking about that thick cinnamon sugar coating you see in the picture, the crispy exterior, and the tender apple inside. If you want rings that look like the ones in that photo, with the rich brown coloration and the visible sugar crunch, you need to read this. Let’s fix your technique so you never suffer through a limp apple ring again.
Mistake Number One: Choosing The Wrong Apple Variety
The apple you pick makes or breaks this dessert. You need a firm apple that holds its shape during frying. Soft varieties like Red Delicious or McIntosh will turn to applesauce in the pan. That is not what we want.
Look for Honeycrisp, Granny Smith, or Fuji apples. These have a higher sugar content and a structure that survives the heat. Granny Smith offers a nice tart contrast to the sweet coating, while Honeycrisp brings natural honey notes.
Here is a quick decision guide:
– Honeycrisp: Sweet, juicy, holds shape perfectly.
– Granny Smith: Tart, firm, balances the sugar well.
– Fuji: Extra sweet, stays crunchy.
– Gala: Decent but can get a bit soft, use if desperate.
I personally reach for Honeycrisp every time. They are pricey, sure, but the texture difference is worth the extra dollar.
Slicing Thickness And The Core Problem
If your rings are too thin, they fry up into brittle chips. If they are too thick, they stay raw in the middle while the outside burns. The sweet spot is about a quarter inch thick.
Now, about the core. The photo shows those beautiful circular holes in the center, right? To get that clean look, you need to core the apple before slicing. I use a simple apple corer and it takes five seconds. Trust me, trying to punch out the seeds after slicing is a messy disaster that leaves weird jagged edges.
You also want to keep your slices even. Inconsistent thickness means some rings cook faster than others. I use a mandoline when I want precision, but a sharp knife and a steady hand work fine. Just pay attention to what you are cutting.
The dry coating strategy goes wrong here. You can dip the rings in egg wash and then toss them in the cinnamon sugar mix. It is a messy job. Your fingers get sticky, the sugar clumps, and you feel like you need a shower afterward. A silicone brush helps you apply the egg wash evenly without drowning the apple slice.
The Cinnamon Sugar Ratio Nobody Talks About
Ok so the photo shows a thick cinnamon sugar coating. The secret is using a ratio that actually sticks and caramelizes. Too much cinnamon and it turns bitter. This is a common mistake that ruins the whole flavor profile.
A ratio of 1/4 cup of white sugar to 1 tablespoon of cinnamon is a good starting point. Some folks add a pinch of nutmeg or allspice, which is lovely for a fall dessert. Mix it thoroughly in a shallow dish, breaking up any clumps with a fork.
When you coat the rings, press the sugar mixture into the surface. Do not just toss them around lightly. You want that thick layer. It will melt and bubble in the pan, creating that signature crispy exterior you see in the image. The sugar needs something to cling to, so make sure the egg wash is tacky before dipping.
The Pan Temperature And Butter Screw-Up
Look, the heat level is the most critical part. If your pan is too hot, the sugar burns and turns black before the apple softens. If it is too cool, the rings soak up oil and become greasy. That deep brown color in the photo is caramelized sugar, not burned food.
Medium heat is generally your friend. I use a heavy cast-iron skillet or a stainless steel pan that distributes heat evenly. You also need a fat with a high smoke point. Butter burns easily, so I mix a little neutral oil with butter. This gives you the flavor of butter without the scorched taste.
The sugar will bubble and sizzle immediately. Give each ring enough space. Crowding the pan lowers the temperature and causes steaming. Cook them for 2 to 3 minutes per side, until they are deeply golden and caramelized. The smell is intoxicating, like candied apples at a fall festival.
Let The Rings Rest On A Wire Rack
This is the step people skip, and the result is soggy rings. If you put the hot rings straight onto a paper towel, the steam gets trapped and softens the crispy coating. Use a wire cooling rack instead. This allows air to circulate around the whole ring, keeping every side crunchy.
That plating matters too. The white ceramic plate in the photo makes the golden brown rings pop. It is a simple presentation that looks elegant without much effort. Let the rings rest for a couple of minutes before serving. The coating sets as it cools slightly, giving you that satisfying crunch.
Serving Suggestions And The Best Way To Eat Them
You can serve these cinnamon apple rings warm on their own. They are a solid family snack, a cozy fall dessert, or a fun after-school treat. A scoop of vanilla ice cream takes them to another level entirely.
Sometimes I drizzle a little salted caramel sauce over the top for special occasions. Or I dust them with extra powdered sugar for a snow effect. The combination of the sweet caramelized exterior and the tender apple is honestly hard to beat. They really do taste like a carnival treat you would get at apple picking season.
One thing though, these do not keep wonderfully. The crispness fades as they sit. If you have leftovers, reheat them in a toaster oven at 350 degrees for a few minutes to bring back some of the crunch. The microwave will turn them into sad, floppy rubber. Don’t say I didn’t warn you.
This recipe is almost forgiving, but the details matter. Pick a firm apple, slice evenly, coat generously, and fry at the right temperature. I have no doubt the photo in your mind can become a real plate of rings on your kitchen table. Try this out and let me know if your family digs in before you even get the ice cream out.
Leave a Comment